AI inference efficiency keeps pushing on. A few years ago the wisdom was that
the human brain is WAY beyond the efficiency of GPUs in data centers. But with
the OpenAI Jalapeño chips and all the other advancements on one side, and the
fact that, hmm, I don't actually type or read infinitely fast, I started
thinking — are we closer to parity at least on "run of the mill" type of
thinking — the things that one does in a workday that are not feats of
genius or accumulated experience condensing into a great decision? Even my
laptop already types code faster than me, even if Qwen 3.8 27B might feel
painfully slow.
So I asked Opus 5 to do the arithmetic properly, with the numbers from Vera
Rubin and OpenAI's Jalapeño on the table. The answer below is published as it
came out, unedited. Here's what I asked:
With the latest AI models and Nvidia's Vera Rubin platform token efficiency or
the new OpenAI Jalopeno chip, what is the effective "thinking wattage" of AI
agents today vs. human brain. A brain is a lot more economic, but on the other
hand it is also only providing "office thinking" with some of that capacity.
Build me a range based on latest data and educated guesses where the data is
scarce (e.g. frontier models — maybe we consider the near-frontier
Chinese open weights models unless we have good guesses for Sol or Opus).
Extrapolating forward, are we months, years or decades from parity, or already
past some limit?
The answer
Short version: you have to split "thinking wattage" into three different quantities, because they give answers that differ by four orders of magnitude — and two of the three crossovers have already happened.
I have a 2 TB backup drive that was written on Linux: LUKS2 encryption,
ext4 inside. Plugging it into a Mac gets you the "The disk you inserted was not
readable by this computer" dialog, with Initialize… sitting right there
next to Ignore — which is not the most desirable default for a
backup disk. I could always attach it to a Raspberry Pi 4 I had running at the time, but the Pi USB power envelope is generally too tight for M.2 SSD drives — the supply browns out on anything this power hungry, and getting a powered USB hub just to read a file from a backup was a hassle.
The usual advice is to install a Linux VM and pass the USB device through. On
an Apple Silicon Mac that is an x86-emulation-shaped afternoon, and macFUSE
plus ext4fuse means a kernel extension and the security-approval dance. Both
felt like too much machinery for "read some files".
So instead I did what I had recently done with vdiread and created luksext4, a pure-Python
read-only reader that implements LUKS, LVM and ext4 well enough to get files
off the drive. Nothing is mounted, nothing is installed into the system, and
the device is opened O_RDONLY — it physically cannot damage the drive.
Like the VDI project, this one was also almost single-shot prompted with Opus 4.8, so what follows is mostly an AI-created tour of an AI-created tool. The main takeaway is that these types of tools can now be created basically on demand, since all the components (LUKS, ext4) are open source, and an agent can either reach for existing libraries or, in a pinch, read the relevant kernel modules and adapt the logic to whatever language you want.
I got to do some data recovery work with an old HDD that used to be in the office machine of a small nonprofit. The PC was decommissioned, but the files needed going through. Turned out the HDD had a few huge (30 GB+) VirtualBox .vdi disk images as its main data — an Inception-style data recovery indeed, disks within disks!
Unfortunately, macOS on Apple Silicon proved very resistant to any easy attempt to get the drives read. After some hours of installing VirtualBox and QEMU and trying to get the things running, I decided to abort that route. Maybe modern AI could write a standalone tool that reads the image file and the filesystem inside it, and provides simple file listing and extraction?
Turns out it very much can — I was able to basically single-prompt the vdiread tool into existence. It is a small read-only CLI that opens a .vdi file, finds the NTFS partition inside it and lets you list,
stat and copy out files. No VirtualBox, no mounting, no root. And, compared to the earlier options, I did not have to use some VDI tool to extract a 30 GB compressed file into a 70 GB uncompressed one and then try to mount it. I could work straight within the original image.
I've been doing a lot of AI-assisted projects lately, and I've felt that many of
them might be interesting to others as well and thus worth sharing. With work
and family keeping me busy, however, I have very little time to document their
progress and publish posts about them. With newer models, I'd rather use my
creative input to guide as many interesting projects as possible and accelerate
the sharing part.
So I'm introducing AI-assisted posts. For these write-ups, AI helps speed up
the reporting part: starting from my project idea, following the implementation
through Git history (with some guidance from me in most cases), and curating
suitable snapshots of the app, script, or whatever to make it clear to others
what it does and how to use it.
Each AI-assisted post will carry a clear disclaimer linking back to this
explanation. The aim is simple: get useful projects out there while they
are still fresh, without taking too much time away from creating them.
I'm very happy to receive feedback on the projects and the idea. You can
probably find my contact info easily and get in touch either through this site
or through the projects themselves. I plan to keep publishing them on GitHub,
at least for the time being :).
Vibe coding has left me with quite a few small development apps. Starting any
one of them is easy, but first I need to remember where it lives, whether it
uses Bun, npm, uv or something else, and which command starts it. Doing this
for a dozen projects started to get a bit old.
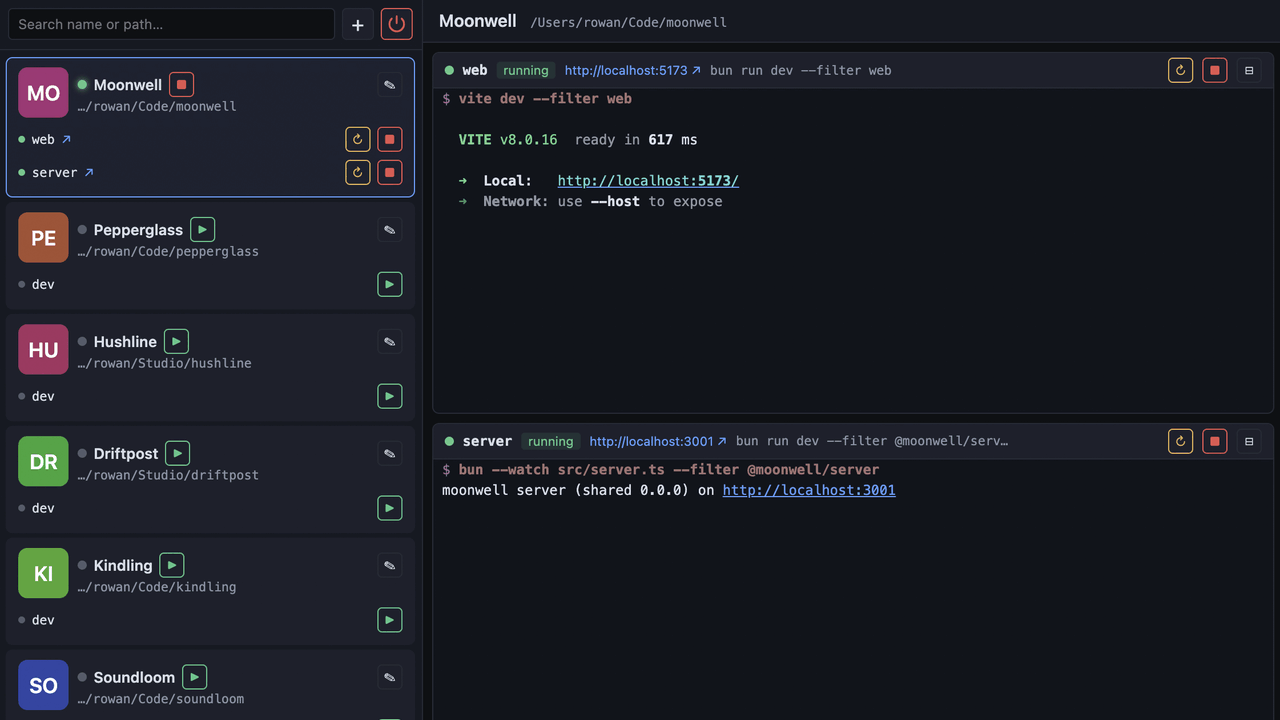
So I made bunrun, a local dashboard for
starting, stopping and watching development apps:
It is intentionally quite simple. A project is just a path and one or more
shell commands. bunrun starts them as child processes, shows their output with
ANSI colors, detects URLs from the output and can open the app in a browser.
When bunrun exits, the child processes exit too — no containers, daemons or
process archaeology required.
KittenTTS is a neat open-source
text-to-speech model that packs a surprising amount of punch in sizes as low as 25 MB. It
has over 11,000 stars on GitHub and for good reason — the output quality
is impressive for something you can run locally. The catch? It's Python-only,
needs pip install gymnastics, and you certainly can't just hand someone a link
and have them try it out.
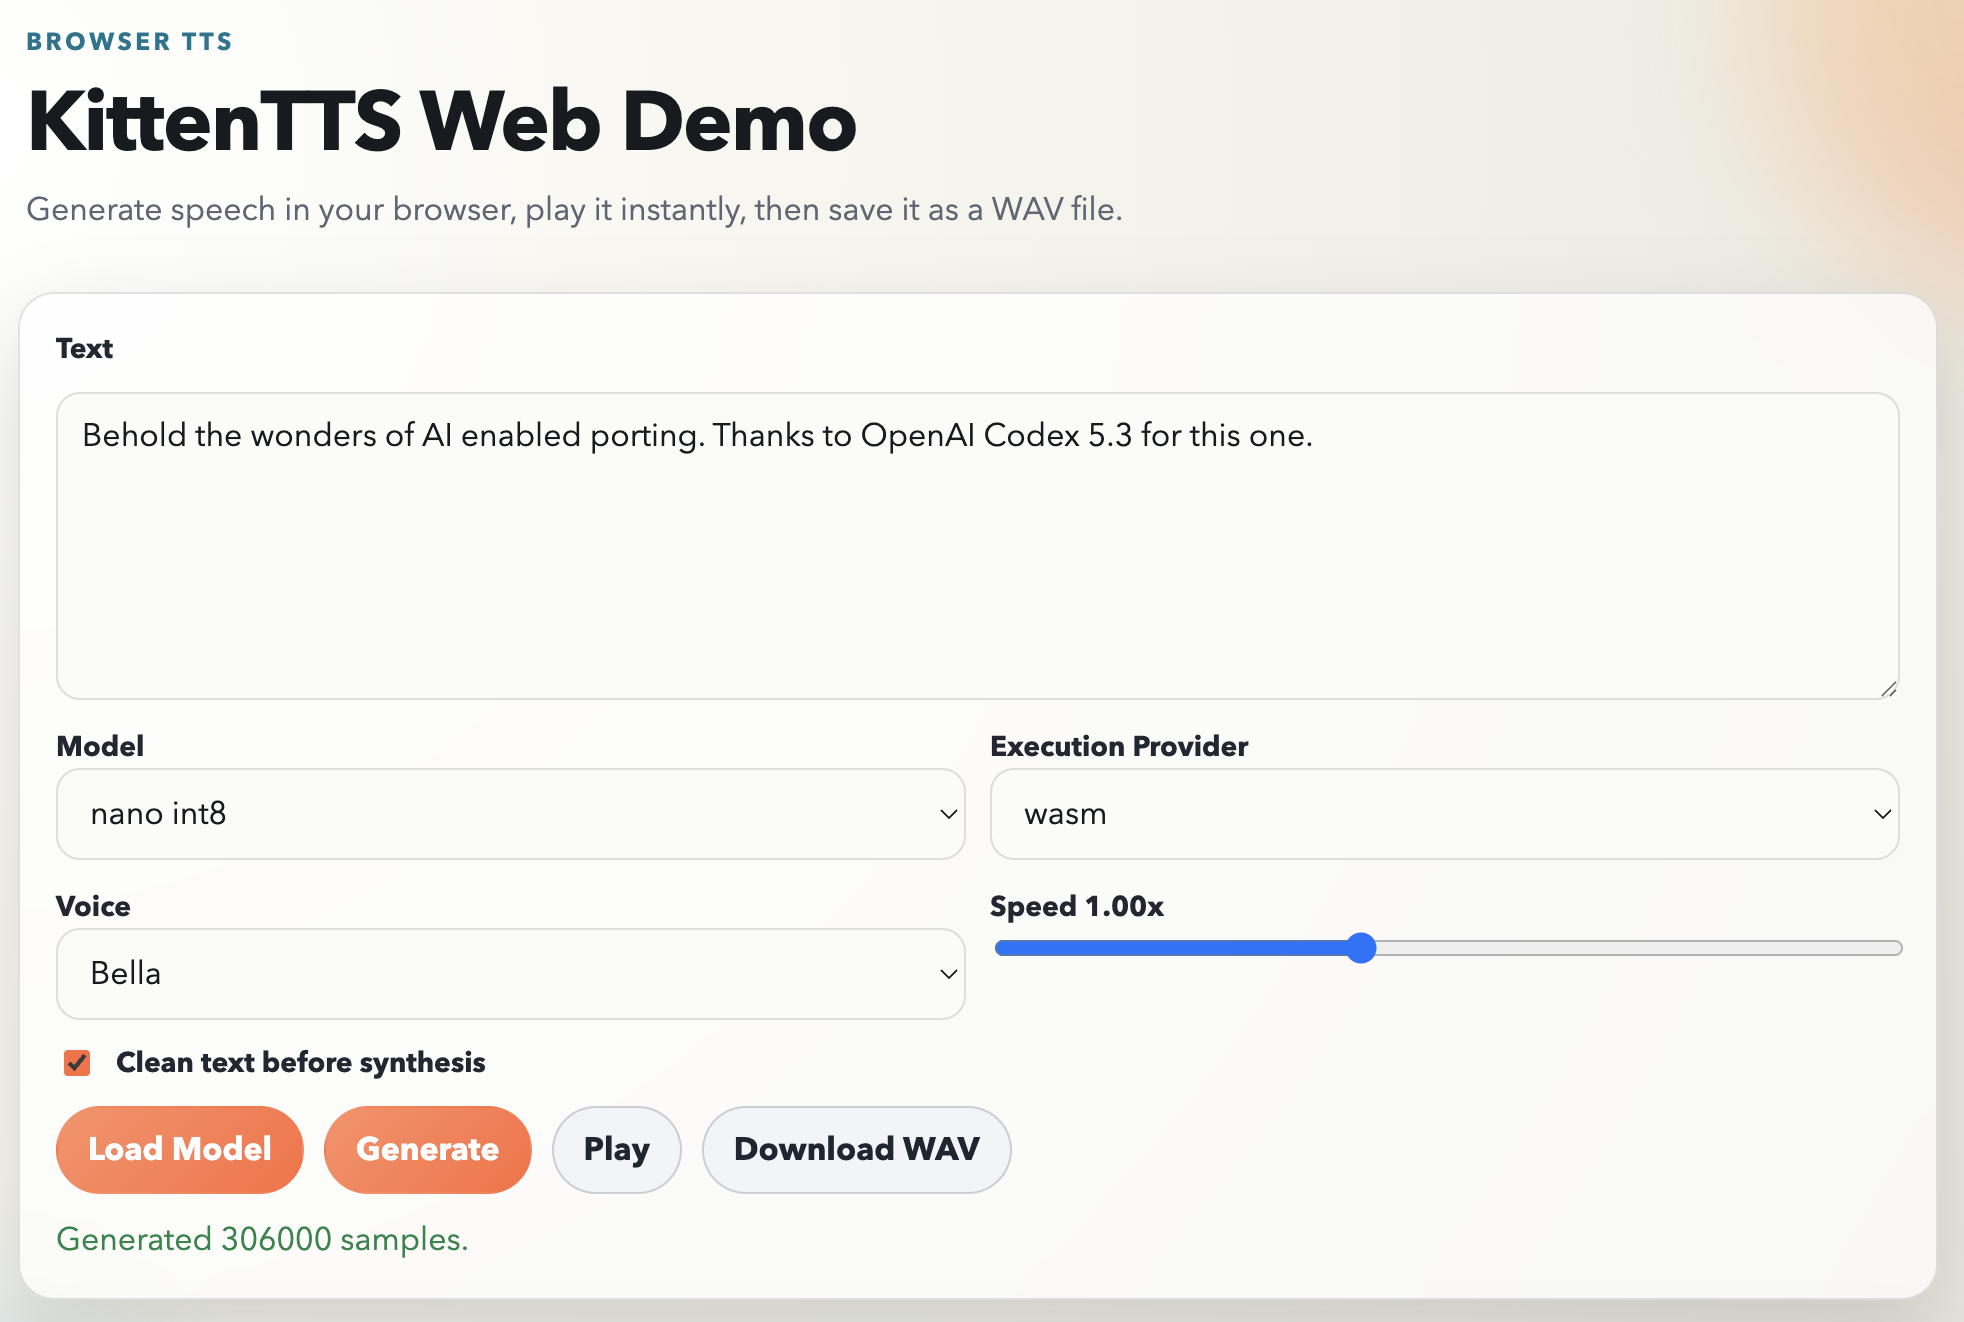
The KittenTTS folks say they have browser version planned, but I was a bit impatient and also was eager to find out if a modern AI agent like Codex could pull off a Javascript port. The plan was simple: you open a page, pick a voice, type some text, and hear it speak. No server, no Python, no installs, available to client side web projects easily.
Spoiler alert: It actually worked almost single shot (I had to prompt my way through the plan and run a bunch of pnpm install commands to work around the sandbox basically). The results are up in https://github.com/jokkebk/KittenTTS-JS, but read on to find out how I got there with ChatGPT Codex 5.3 doing the heavy lifting.
The Plan
I started by asking Codex how hard it would be to create a browser JS port.
It studied the Python codebase, identified the pipeline stages, and came back
with a surprisingly thorough analysis. The core pipeline is:
Text preprocessing (cleanup, sentence chunking)
Phonemization via eSpeak
Token mapping (phonemes to integer IDs)
ONNX model inference per chunk
Waveform concatenation
The model itself is a single ONNX graph that takes tokenized phonemes, a voice
style vector, and a speed parameter, and outputs raw audio samples directly.
No separate vocoder needed. This is key — it meant the browser port just
needed ONNX Runtime Web and the right input pipeline.
Codex also noted the tricky bits: voice embeddings stored in NumPy's .npz
format (basically a ZIP of .npy files), and the eSpeak phonemizer which is a
C library. Both have WebAssembly ports available, making the whole thing
feasible. It laid out a 7-phase plan with API design, repo layout, risk
mitigations, and estimated about 7–8 days for a robust V1. I had it write
the plan to PLAN.md before proceeding — having that concrete reference
turned out to be valuable.
Letting Codex Work
With the plan saved, I told it to go ahead. Here's roughly what happened over
the next few hours, based on the commit history: